Hey there folks.
So, the end of my holiday is tomorrow. I promised myself that, in the two weeks off I've had, I'd paint up two 10 man assault squads, my 6 man Death Company and build the Stormraven. How far have I got? Well the D.C are 50% done, the assault squads are 25% started (i.e 5 of one squad are base coated) and the Stormraven was in two halves with no cockpit, no ramps, no engines......I've got to do at least one of the jobs on the list, so I'm focusing on the 'Raven.
Here's a little more progress I made yesterday.
First off I got sick of painting fiddly boring interior so I finally decided to get the two main hull segments glued together. The inside of the original Valkyrie hull is painted enough for it to be acceptable and I really wanted it together so I could start on the rest of the structure properly.
The first job was to box in more of the foam pieces (used to bulk the body out) using plasticard and good old milliput (above and below minus most of the milliput). This has given the front more bulk round the front ramp. The milliput will all be sanded down in a day or two when it's more cured.
The initial area of the external structure I wanted to focus on was the front by building a suitable 'cockpit'. I've mentioned before in one of the other Stormraven posts that I'd rather have a Land Raider style front (i.e no crew view slits/screens and have evidence of the lenses etc for power of the machine spirit) rather than a 'glass' canopy. I thought I'd tie in the Valkyrie lights with a couple of layers of angled plates and potentially a sponson/turret mounted weapon option. After playing aound a bit the turret clearly wouldn't really fit. This picture shows front prototype number 4 which I'm pretty settled on. 1-3 were either really rubbish or made of paper templates so I didn't bother with pictures I'm afraid. The main panel is quite plain but I'll add to that before the build is over. I also managed to fit the twin multi melta on the front there - hence the two holes.
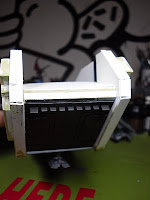
Lastly (for now) whilst preparing the structural supports at the back of the craft I discovered how wonky it was (above). I guess this is due to having the two halves separate when the hull sides were attached to them. Too late to change them now though so I just had to let it go and mend what I'd got. It's only 2mm out, but one side up and one side down by that much = 4mm difference. I boxed the rear panel in with more plasticard and milliput and, while in's still not perfect, it's made a good enough difference (below).
Well that's yesterday's photo's done with. By the end of the night I want to have the cockpit/sensors attached, along with the multi meltas and the front two sections of the roof. That'll leave me tomorrow to work on the back roof (where the engines will sit) and the rear ramp/doors for an embarked dreadnought. With a bit of luck I'll have a flight worthy Stormraven by the end of the weekend!
Any comments or feedback are more than welcome so feel free to stick a comment in the box below.
Check back for another update soon, I'm back of the the cutting mat...


